Showing posts with label SharePoint 2010. Show all posts

April 15, 2015

The remote server returned an error: (403) Forbidden while Connecting to SharePoint site with Managed CSOM

While I was working with my site with Managed CSOM got below error.


System.Net.WebException: The remote server returned an error: (403) Forbidden.at System.Net.HttpWebRequest.GetResponse()at Microsoft.SharePoint.Client.SPWebRequestExecutor.Execute()at Microsoft.SharePoint.Client.ClientContext.GetFormDigestInfoPrivate()at Microsoft.SharePoint.Client.ClientContext.EnsureFormDigest()at Microsoft.SharePoint.Client.ClientContext.ExecuteQuery()at SharePointConsoleApplication1.Program.ConnectSharePoint() in c:\Vinay\Projects\SharePointConsoleApplication1\SharePointConsoleApplication1\Program.cs:line56at SharePointConsoleApplication1.Program.Main(String[] args) in c:\Vinay\Projects\SharePointConsoleApplication1\SharePointConsoleApplication1\Program.cs:line31

This looks strange. After doing some research on Google I got the below solution.

private static void ConnectSharePoint()
{
    try
    {
        using (ClientContext clientContext = new ClientContext(""))
        {
           clientContext.ExecutingWebRequest += clientContext_ExecutingWebRequest;
           List list = clientContext.Web.Lists.GetByTitle("");
           clientContext.Load(list);
           clientContext.ExecuteQuery();
           Console.WriteLine("Connected");
        }
    }
    catch
    {        throw;    }
}

static void clientContext_ExecutingWebRequest(object sender, WebRequestEventArgs e)
{
    try
    {
        e.WebRequestExecutor.WebRequest.Headers.Add("X-FORMS_BASED_AUTH_ACCEPTED", "f");
    }
    catch
    {        throw;    }

}

Hope this solution will help you and save time.

March 25, 2014

SharePoint 2010 to SharePoint 2013 Migration : Part 2

:: SharePoint 2010 to SharePoint 2013 Migration : Part 2 ::

Hello


Continue for SharePoint 2010 to SharePoint 2013,

Part 2 :: Custom Code Migration to VS 2013


After migrating database of SharePoint 2010 to SharePoint 2013, if there is custom code for SharePoint 2010 then we can deply the wsp as is, but if any changes in the code then it is hard to maintain two enviornment of SharePoint, so it is better to upgrade the code to VS 2013.

Here are the steps to be consider for upgrading custom code,

1) Install VS 2013

2) Copy Solutions built in VS 2010. On SharePoint 2013.

3) Run the VS 2013 with Admin Credentials

4) Open the Solution in VS 2013, which will ask for upgrade, if solution is upgraded then it cannot be used for VS 2010, so always make copy of code.

5) After code is upgraded it will show the Upgrade reports.

6) Open the .csproj files in Solutions for all projects, and replace

<TargetFrameworkVersion>v3.5</TargetFrameworkVersion> with <TargetFrameworkVersion>v4.5</TargetFrameworkVersion>
 
7) Open the Packages present in the Solutions, and change the SharePoint Product Version to 15.0


8) Change the Microsoft.SharePoint Reference in non-SharePoint project,

C:\Program Files\Common Files\microsoft shared\Web Server Extensions\15\ISAPI\Microsoft.SharePoint.dll

9) Add other third party reference used in code.

10) Change the Assembly version of SharePoint DLL as, 14.0.0.0 to 15.0.0.0
Assembly="Microsoft.SharePoint, Version=15.0.0.0,

11) Now if anything /_layouts/ or /_CONTROLTEMPLATES/ used in code change it to /_layouts/15/ or /_CONTROLTEMPLATES/15/ which will deploy the related files in 15 hive... 


12) Now build the solution and if any missing reference then add the reference and solution is ready for deployment.

SharePoint 2010 to SharePoint 2013 Migration : Part 1


:: SharePoint 2010 to SharePoint 2013 Migration : Part 1 ::

Hello

We cover the migration in two parts

1) Database Migration
2) Custom Code Migration to VC 2013.

Part 1 :: Database Migration

1) Go to your old SharePoint database, then copy the WSS_Content database.


2) Verify source server properties.


3) Set your destination SQL Server.


4) Select the Transfer Method, use the SQL Management Object method if you want a live migration.


5) Select a database to copy, you will only need WSS_Content.

 
6) Configure the properties of Destination Database.


7) Select Objects, you only need Logins here.

8) Saving the package created.


9) Run immediately, you can also schedule them.


10) Look at the summary.


11) Wait while it's performing the copy


12) Or Just Backup and Restore Database will also work for all above 10 steps.

13) Once done, go back to SharePoint 2013 Central Administration and set your SharePoint instance to use the copied WSS_Content database.

14) Go to Application Management -> Manage Web Applications. -> Create a new Web Application

15) Now you need to set that new web application to use the copied WSS_Content database, you need to do this in SharePoint 2013 Management Shell

16) Test the database you just copied over by issuing this command:

Test-SPContentDatabase -Name WSS_Content -WebApplication http://YourNewSharepointServer:portNumber
17) Now mount them by issuing this command
Mount-SPContentDatabase -Name WSS_Content -WebApplication http://YourNewSharepointServer:portNumber

18) Now that it's mounted, you need to delete the default WSS_Content database created during the installation process, choose the default WSS_Content instance, if it's a fresh install usually it's the one with zero site collection items. 
 

September 19, 2013

Display Item Attachments in SharePoint List View

It is very easy to display list item attachments
in List View and also manipulate the display of attachment, like if attachment is
image, we can display image not just a link.


1. Open List View in SharePoint Desinger
2. Add new column titled "Attachments".

3. Select TD tag of New column.


4. Replace selected code with below code.


 <td id="ItemAttchment" class="ms-vb">
          <xsl:element name="SharePoint:AttachmentsField">
          <xsl:attribute name="runat">server</xsl:attribute>
          <xsl:attribute name="FieldName">Attachments</xsl:attribute>
          <xsl:attribute name="ControlMode">Display</xsl:attribute>
          <xsl:attribute name="Visible">true</xsl:attribute>
          <xsl:attribute name="ItemId">
          <xsl:value-of select="@ID"/>
          </xsl:attribute>
          </xsl:element>
</td>

 and also add

<xsl:value-of select="$thisNode/@ID"></xsl:value-of>


5. View with Attachments

Enjoy !!!

August 7, 2013

SharePoint Bulk Delete List Items Programatically

While working on a custom SharePoint solution, I had a requirement to delete multiple list items one time rather than deleting one by one.

Example: Delete only the items from a list which doesn't have value for a custom column.

When i think of the solution i couldn't make new SPListItemCollection object out of the items which needs to be deleted, which is possible in regular c# application development.
However in SharePoint we can do the batch delete of list items using CAML script.
The CAML script needs to be generated for the items which needs to be deleted as below.

Get the list items:
SPListItemCollection items = spList.Items;

Generate CAML Script:

StringBuilder methodBuilder = new StringBuilder();
string batchFormat = "" +
"{0}"; //{0}-methodFormat

string methodFormat = "" + //{0}-Unique Value for each Item
"{1}" + //{1}-List Guid
"{2}" + //{2}-List ItemID
"Delete" +
"
";


// Build the CAML delete command script.
foreach (SPListItem item in items)
{
    //get the custom column value
    string customColumnValue = string.Empty;
    if (null != item["CustomColumnName"])
        customColumnValue = item["CustomColumnName"].ToString();
   
    //check whether custom column is empty
    if (string.IsNullOrEmpty(customColumnValue))
    {
        methodBuilder.AppendFormat(methodFormat, item.ID, item.ParentList.ID, item.ID);
    }
}


//batch delete script. 
string batchDeleteScript = string.Format(batchFormat, methodBuilder.ToString());


Execute CAML Script:

spWeb.ProcessBatchData(batchDeleteScript);

SharePoint Bulk Update List Items Programatically

While working on a custom SharePoint solution, I had a requirement to update multiple list items one time rather than updating one by one.

Example: Update only the items in a list which doesn't have value for a custom column (update with some value).

When i think of the solution i couldn't make new SPListItemCollection object out of the items which needs to be updated, which is possible in regular c# application development.

However in SharePoint we can do the batch update of list items using CAML script.
The CAML script needs to be generated for the items which needs to be updated as below.


Get the list items:

 SPListItemCollection items = spList.Items;
Generate CAML Script:

StringBuilder methodBuilder = new StringBuilder();
string batchFormat = "" +
"{0}"; //{0}-methodFormat
string methodFormat = "" + //{0}-Unique Value for each Item
"{1}" + //{1}-List Guid
"Save" +
"{2}" + //{2}-List ItemID
"{4}" + //{3}-Column Name, {4}-Column Value
"
";


// Build the CAML update command script.
foreach (SPListItem item in items)
{
    //get the custom column value
    string customColumnValue = string.Empty;
    if (null != item["CustomColumnName"])
        customColumnValue = item["CustomColumnName"].ToString();
   
    //check whether custom column is empty
    if (string.IsNullOrEmpty(customColumnValue))
    {
        methodBuilder.AppendFormat(methodFormat, item.ID, item.ParentList.ID, item.ID, "CustomColumnName", "New Updated Value");
    }
}

//batch update script. 
string batchUpdateScript = string.Format(batchFormat, methodBuilder.ToString());


Execute CAML Script:

spWeb.ProcessBatchData(batchUpdateScript);
 

July 11, 2013

Orphan Event Receiver

I was wokring on to remove 'Orphan Event Receiver' without affecting the exitsting application, I research a lot and found one workaround,


Steps to Remove orphan event receiver,

1)      Use SharePoint Manager Utility, to check is there any event receiver present or not, if present remove the event receiver using SharePoint Manager Utility
2)      Execute following power shell script,
  function Remove-SPFeatureFromContentDB($ContentDb, $FeatureId, [switch]$ReportOnly)
{
    $db = Get-SPDatabase | where { $_.Name -eq $ContentDb }
    [bool]$report = $false
    if ($ReportOnly) { $report = $true }
   
    $db.Sites | ForEach-Object {
       
        Remove-SPFeature -obj $_ -objName "site collection" -featId $FeatureId -report $report
               
        $_ | Get-SPWeb -Limit all | ForEach-Object {
           
            Remove-SPFeature -obj $_ -objName "site" -featId $FeatureId -report $report
        }
    }
}
function Remove-SPFeature($obj, $objName, $featId, [bool]$report)
{
    $feature = $obj.Features[$featId]   
    if ($feature -ne $null) {
        if ($report) {
            write-host "Feature found in" $objName ":" $obj.Url -foregroundcolor Red
        }
        else
        {
            try {
                $obj.Features.Remove($feature.DefinitionId, $true)
                write-host "Feature successfully removed from" $objName ":" $obj.Url -foregroundcolor Red
            }
            catch {
                write-host "There has been an error trying to remove the feature:" $_
            }
        }
    }
    else {
        #write-host "Feature ID specified does not exist in" $objName ":" $obj.Url
    }
}
Remove-SPFeatureFromContentDB -ContentDB "ContentDBName" -FeatureId "FeatureID" –ReportOnly
This Command will report the Feature is present in DB or not.
 
Remove-SPFeatureFromContentDB-ContentDB "ContentDBName"-FeatureId "FeatureID"
This command will remove the Feature from DB

After that check the featuer still existing using 'SharePoint Manager' and if still exisit delete using 'SharePoint Manager'
And reinstall the fearture...
Thanks... if you found any better solution please post.

July 4, 2013

Allow Anonymous users but still SharePoint site popup for Credentials.

With some development part, I came across one issue, I allow Anonymous users on my site, but when I access Portal, still it gives popup for credentials..

I searched all blogs, and check setting everywhere, but unable to find the issue, then last I come across one article in TechNet (Choose security groups) and that help me to resolve the issue.

If in permission for Site in Central Admin, has Deny All; then portal will not behave as Anonymous. So I removed the Deny All permissions and it works..

Here is the article.. (Link)
 
Permission policies provide a centralized way to configure and manage a set of permissions that applies to only a subset of users or groups in a Web application. You can manage permission policy for anonymous users by enabling or disabling anonymous access for a Web application. If you enable anonymous access for a Web application, site administrators can then grant or deny anonymous access at the site collection, site, or item level. If anonymous access is disabled for a Web application, no sites within that Web application can be accessed by anonymous users.
  • None No policy. This is the default option. No additional permission restrictions or additions are applied to site anonymous users.
  • Deny Write Anonymous users cannot write content, even if the site administrator specifically attempts to grant the anonymous user account that permission.
  • Deny All Anonymous users cannot have any access, even if site administrators specifically attempt to grant the anonymous user account access to their sites.
Hope it will help...


January 7, 2013

Invalid URI: The URI is Empty while Activating K2 Features from Centrial Administration

Hello All,

I was working with some exiting application where K2 and SharePoint is already in use. But due to some reason ‘Activate All K2 Features’ and ‘K2 Configuration Settings from Central Administration is giving error: ‘Invalid URI: The URI is empty. for New Web Applications.

I had done research and come to know that, when we create new Web application and new site collection, that site URL has to be added into the K2 Workspace which has mapped in SQL database of Environment Field Values.

Somehow this SharePoint Site Web Application URL is not added in to it, to the SharePoint Site variable, it was giving error, so for temporary fix we can add the URL to that variable in K2 Workspace.

This is manual efforts so If anyone has any better solution please post or reply...

August 17, 2012

Duet Enterprise for SharePoint and SAP

Duet Enterprise for Microsoft SharePoint and SAP is a new jointly developed product from SAP and Microsoft that enables interoperability between SAP applications and Microsoft SharePoint Server 2010 Enterprise Edition. Duet Enterprise empowers employees to consume and extend SAP processes and information from within SharePoint Server 2010 and Microsoft Office 2010 client applications.

Components that support Duet Enterprise


The following figure shows the components of Microsoft SharePoint Server 2010 on which Duet Enterprise is built. The SAP system components that are shown support Duet Enterprise.


The following list describes the key components on the SharePoint system (shown in Figure) that are used by Duet Enterprise and the key components in the SAP environment, (Shown in Figure) that support Duet Enterprise.


1. SharePoint workflow functionality supports interactions between SharePoint users and SAP workflows.

2. The Enterprise Content Manager component is used to manage the lifecycle of documents, such as SAP reports.

3. Duet Enterprise uses the SharePoint Security Token Service to interact with the claims-based authentication provider that is provided by SharePoint Server 2010 to authenticate users using SAML tokens.

4. The Microsoft Business Connectivity Services provide a connector for communication between Microsoft SharePoint Server and the SAP environment along with other features used to connect to and interact with SAP information.

5. The reporting modules that run on SAP NetWeaver or SAP Business Information Warehouse provide reporting functionality around SAP data.

6. The SAP Workflow engine runs all SAP workflows.

7. SAP Enterprise services are used to interact with the SAP Business Suite and retrieve SAP information and content.

8. The SAP Shared Master Data and Computing Center Management System tools are used to monitor SAP systems and SAP Duet Enterprise components. These SAP supportability tools are described in the Monitoring and Troubleshooting section, later in this article.

To Explorer more Visit MSDN or Duet Enterprise...


June 21, 2012

Resolving the g_instanceId undefined error in Meeting Workspaces

If you’re utilizing a custom master page derived from the OOTB v4.master page, you’ll probably notice Re-occurring meeting work spaces begin to fail when trying to navigate between dates of said workspace.  To reproduce the problem, simply create a calendar, add a re-occurring event to the calendar and choose the option to use a meeting workspace to manage the events.  Click through to the workspace and then use the date navigation in the left hand side navigation bar… If you haven’t implemented the fix below, you will see a JavaScript ‘g_instanceId is undefined’ or similar error.


To resolve, there are two solution,

1) Edit your custom masterpage and add the ‘Meetings’ Tag Prefix below the ‘Microsoft.SharePoint’ namespace import declaration as per below

<%@ Import Namespace="Microsoft.SharePoint" %>
<%@ Register Tagprefix="Meetings" Namespace="Microsoft.SharePoint.Meetings"
Assembly="Microsoft.SharePoint, Version=12.0.0.0, Culture=neutral, PublicKeyToken=71e9bce111e9429c" %>

then, simply add the meetings ‘PropertyBag’ web control directly after the opening tag:

<body scroll="no" onload="if (typeof(_spBodyOnLoadWrapper) != 'undefined') _spBodyOnLoadWrapper();" class="v4master">
<Meetings:PropertyBag ID="PropertyBag1" runat="server"/>

Package and redeploy…

2)  There are many cases where developer does not have access to master page, so this is not fix, but a work around.

Add HTML Web part Page and paste following script in it,
<Script language="JavaScript">
function MtgNavigate(a)
{
window.location.href="[siteurl]/default.aspx?InstanceID="+a
}
</Script>

When we click on any dates in Meeting workspace, it will call MtgNavigate() with the selected date as in parameter, so we have to just redirect with the URL parameter, and its done.

Enjoy, if any one have any other solution, please send to us or publish.

November 8, 2011

SharePoint with MicroStrategy

MicroStrategy has introduce SharePoint 2010 web parts for integration in May 2011.
It will support SharePoint 2007 and SharePoint 2010.

Main Feature :

• Displaying toolbars to change views of reports, format, and export data
• Drilling for more details within the web part or to a new window
• Enabling context-sensitive right-click menus
• Performing OLAP manipulations such as sort, pivot, page-by slices of the report, and add new calculations
• Communicating with other MicroStrategy and/or third-party web parts

Here is the link for details…
http://www.microstrategy.com/bi-applications/bydatasource/microsoft/sharepoint.asp

And Here is the blog for Integation with SharePoint from Shiv..
http://shivsquest.blogspot.com/2011/10/sharepoint-with-microstrategy.html

September 20, 2011

Cloud Connector for Microsoft SharePoint 2010 and Office 365

Hi,

Here is a good tool by Layer2, "Cloud Connector for Microsoft SharePoint 2010 and Office 365".

SharePoint Cloud Connector was specially developed to solve the specific challenges of remote hosted disconnected systems in the cloud without any direct access to corporate business data and very restricted feature customization capabilities.


Please see the video for more information.


July 27, 2011

Configuring Windows and Form Based Authentication in SP-2010

Hi,

Here is good demonstrated video for Configuring Windows and Form based authentication both in SharePoint 2010.

June 28, 2011

Google Chart Tools - Display Live Data on your site.

Hi, I am trying to give one POC (Proof of Concept) to my client, requirment is to show the attractive reports, without any deployment, with only ADMIN rights to one of the SharePoint 2007 site.

I searched a lot and finally decide to go with Google Chart Tools. We can fetch the data from sharepoint list view webpart and can create the chart in SharePoint page using javascript.

Here is the simple example...


and the code to get the above result is..

<div id="chart_div1"></div>
<script type="text/javascript" src="https://www.google.com/jsapi"></script>
<script type="text/javascript">
google.load("visualization", "1", {packages:["corechart"]});
if(typeof jQuery=="undefined"){
var jQPath="http://ajax.googleapis.com/ajax/libs/jquery/1.3.2/";
document.write("<script src='",jQPath,"jquery.js' type='text/javascript'><\/script>");
}
</script>


<script type="text/javascript">
$("document").ready(function(){
google.setOnLoadCallback(drawChart1);
});

function drawChart1() {
var arrayList=$("td.ms-gb:contains('Implemented Solution')");
var coord= new Array();
var labels= new Array();
var titles= new Array();
total=0

$.each(arrayList, function(i,e)
{
var MyIf= $(e).text();
var txt= MyIf.substring(MyIf.indexOf('(')+1,MyIf.length-1); // Extract the ‘Y' coordinates
coord[i]=txt;
total=total+(txt*1)
var txt1= MyIf.substring(MyIf.indexOf(':')+2,MyIf.indexOf("(")-1); // Extract the labels
titles[i]=txt1;
});


for(i=0;i<coord.length;i++)
{
//coord[i]=Math.round((coord[i]/total*100)*10)/10
labels[i]=titles[i]+ coord[i] //"("+coord[i]+"%)"; //update the total
}

var data = new google.visualization.DataTable();
data.addColumn('string', 'Technology Env');
data.addColumn('number', 'Application');
data.addRows(coord.length);

for(i=0;i<coord.length;i++)
{
data.setValue(i, 0, titles[i]);
data.setValue(i, 1, parseInt(coord[i]));
}

var chart1 = new google.visualization.PieChart(document.getElementById('chart_div1'));
chart1.draw(data, {width: 600, height: 440, title: 'Implemented Solution', is3D:true, vAxis: {title: '', titleTextStyle: {color: 'red'}}});
}

</script>

For more Information .... Google Chart Tools

April 29, 2011

Find Web visitor’s Location Automatically with Google APIs

This works great in the United States and has mixed results elsewhere. I’m working to see if I can change that. If your primary customer base is in the US, use this confidently. If your primary customer base is elsewhere, use in development stage only.

Google provides IP address to location translation for FREE! Whenever you use Google’s jsapi script to dynamically load a Google AJAX API, Google automatically populates google.loader.ClientLocation, which has all the juicy details about the web visitor’s location.

We can also add this to SharePoint Portal in Content Editor web part.

Script :

<DIV id='info'> </div>

<script type="text/javascript" src="http://www.google.com/jsapi?key=ABQIAAAAp04yNttlQq-7b4aZI_jL5hQYPm-xtd00hTQOC0OXpAMO40FHAxQMnH50uBbWoKVHwgpklyirDEregg"></script>
<script type="text/javascript">
if(google.loader.ClientLocation)
{
     visitor_lat = google.loader.ClientLocation.latitude;
     visitor_lon = google.loader.ClientLocation.longitude;
     visitor_city = google.loader.ClientLocation.address.city;
     visitor_region = google.loader.ClientLocation.address.region;
     visitor_country = google.loader.ClientLocation.address.country;
     visitor_countrycode = google.loader.ClientLocation.address.country_code;

     document.getElementById('info').innerHTML = '<p>Lat/Lon: ' + visitor_lat + ' / ' + visitor_lon +   '</p><p>Location: ' + visitor_city + ', ' + visitor_region + ', ' + visitor_country + ' (' + visitor_countrycode + ')</p>';
}
else
{
      document.getElementById('info').innerHTML = '<p>Whoops!</p>';
}

</script>


March 19, 2011

PowerPivot videos on Microsoft Technet...

Hi,

I found some good video for implementation of PowerPivot...
It is actually good to get PowerPivot......

PowerPivot Part 1 - Loading Data

PowerPivot Part 2 - Preparing Data

PowerPivot Part 3 - Analysis

PowerPivot Part 4 - Sharing in SharePoint 2010

PowerPivot Part 5 - Management

March 4, 2011

SharePoint 2010 and Powerpivot

Sharepoint 2010 in Hindi

I am referring to mutli-linguistic feature of Sharepoint 2010.

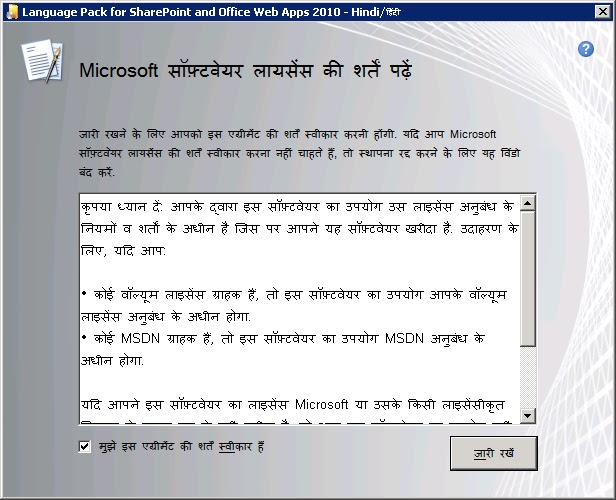
You can have sites displayed to users in their own regional languages as long as it is approved by Microsoft. Follow these steps to setup in your environment.


For each language pack you will need to carry out below steps on each web servers. However, remember that every language install has unique name hence you will need to save this to separate folder to avoid overwrite of another language pack


Download language pack from http://www.microsoft.com/downloads/en/details.aspx?displaylang=en&FamilyID=046f16a9-4bce-4149-8679-223755560d54

Choose Hindi from below and hit Change button


Click on download in hindi


Run configuration wizard – will skip this (if you reading this that means you know what is this)


Once installed you will see the language ID installed 1081 for hindi %COMMONPROGRAMFILES%\Microsoft Shared\Web server extensions\14\LAYOUTS\Locale_ID


To verify this further, you can browse to below link at CA


Central Administration -> Upgrade and Migration -> Check product and patch installation status.


Special Thanks To : Jaspal, Amarprit